Monday, December 7, 2009
3:07 AM | Posted by
Shadi |
Edit Post
Anyone who has played with partitions and dual booting different operating system "knows that the Master Boot Record (MBR) is always overwritten and maintains the user to restart your original installation of Windows 7. Recently, I had the tedious task attempting to install the Mac OSX Leopard on PC hardware and I found many issues including a problem with restoring the MBR to the previous installation of Windows 7. Generally, running the repair option from the Windows installation disc 7 works is magic and reviews of home repair the item, but would not be the case this time. What I had to do is use the command prompt and use the command Bootsect.exe to fix the MBR. Why Repair Start did not work, I know ... it normally does, but it was successfully restored and Windows 7 is working very well now.

Just a warning: If you do not feel comfortable with the command prompt, double boots and partitions, you may not want to try this method. While it is safe, I would recommend having someone who is familiar with these procedures to perform this restoration.
Here's how to update the boot sector code:
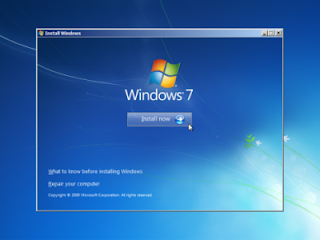
Boot from the Windows 7 DVD or image and follow the prompts until you reach the option to repair the equipment.
You are prompted to the Windows installation you would like to retrieve. Select the option to use the repair tools that can help solve problems starting Windows. Select the appropriate installation and click Next.
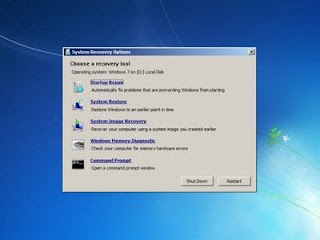
The following screen will include the following repair options. Normally you can only select Startup Repair and Windows does the rest and take care of everything automatically. I always try this first option before delving into the command line. However, if the Startup Repair does not work in your installation, you can select the command prompt and continue.

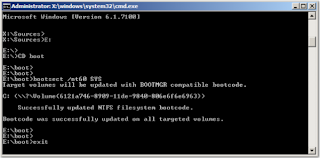
We will need to access the CD Drive, so type the appropriate drive letter (e.g. E:) at the X:\Sources=> prompt, then hit Enter.
Now, with the E:\ prompt up, we need to switch to the boot prompt, so type CD Boot.
The Prompt should change to E:\boot>. Type bootsect /nt60 SYS (there should be a space between bootsect and the ‘/’) then hit Enter.
You should receive a message that the ‘Bootcode was successfully updated on all targeted volumes’.
Type exit to return to the recovery options window and Restart or Shutdown.


Just a warning: If you do not feel comfortable with the command prompt, double boots and partitions, you may not want to try this method. While it is safe, I would recommend having someone who is familiar with these procedures to perform this restoration.
Here's how to update the boot sector code:
Boot from the Windows 7 DVD or image and follow the prompts until you reach the option to repair the equipment.
You are prompted to the Windows installation you would like to retrieve. Select the option to use the repair tools that can help solve problems starting Windows. Select the appropriate installation and click Next.
The following screen will include the following repair options. Normally you can only select Startup Repair and Windows does the rest and take care of everything automatically. I always try this first option before delving into the command line. However, if the Startup Repair does not work in your installation, you can select the command prompt and continue.

We will need to access the CD Drive, so type the appropriate drive letter (e.g. E:) at the X:\Sources=> prompt, then hit Enter.
Now, with the E:\ prompt up, we need to switch to the boot prompt, so type CD Boot.
The Prompt should change to E:\boot>. Type bootsect /nt60 SYS (there should be a space between bootsect and the ‘/’) then hit Enter.
You should receive a message that the ‘Bootcode was successfully updated on all targeted volumes’.
Type exit to return to the recovery options window and Restart or Shutdown.

Subscribe to:
Post Comments (Atom)
Blog Archive
Labels
- Aero (1)
- iTunes (1)
- NetBook (1)
- Network (1)
- Touch Screen (1)
- Wallpaper (1)
- Windows 7 Features (4)
- Windows 7 How To? (4)
- Windows 7 Update (1)
- Zune (1)
0 comments:
Post a Comment